


If you want to add flavor and nutrition to your garden, growing elderberry is a great choice. These shrubs grow fast and are cold-hardy. They bloom white in summer and give lots of purple to black fruits in fall.
This guide is for both new and experienced gardeners. It covers the basics of elderberry cultivation. You’ll learn how to grow a successful elderberry farm.
Key Takeaways
- Elderberries are native to many areas in the United States and are becoming increasingly popular as a garden addition.
- They thrive in a wide range of soils, but prefer moist, fertile, well-drained soil with a pH between 5.5-6.5.
- Elderberries are shallow-rooted and require consistent watering, especially in the first season.
- Propagation can be done through softwood, hardwood, and hardwood with sprouts cuttings.
- Planting elderberries in pairs, no more than 60 feet apart, ensures cross-pollination for optimal fruit production.
Understanding Elderberry: Types and Characteristics
Elderberry is a plant that’s good for you and comes in two types. These are the American elderberry (Sambucus canadensis) and the European elderberry (Sambucus nigra). Both have similar benefits but differ in a few ways.
American vs. European Elderberry Varieties
The American elderberry grows in the eastern and central U.S. It likes zones 3 to 9 and can grow 5 to 10 feet tall. It’s a dense shrub with many stems.
The European elderberry is a bit less cold-tolerant. It can grow up to 20 feet tall, looking more like a tree.
Growth Habits and Plant Description
Both types have leaves with jagged edges and small, white flowers in spring. These flowers turn into purple-black berries in late summer. Elderberries are among the first plants to grow leaves in spring.
Health Benefits and Uses
Elderberries are full of vitamins and minerals like A and C, phosphorus, potassium, and iron. They help boost your immune system and have been used for centuries in medicine. But, you must cook the berries and other parts before eating them because they can be toxic raw.
| Elderberry Variety | Growing Characteristics | Fruit Characteristics |
|---|---|---|
| American Elderberry (Sambucus canadensis) | 5-10 feet tall and wide, cold-hardy in zones 3-9 | Purple-black berries, high in vitamins and nutrients |
| European Elderberry (Sambucus nigra) | Up to 20 feet tall, less cold-hardy than American variety | Purple-black berries, similar nutritional profile to American |
Selecting the Perfect Growing Location

Choosing the right spot for elderberries is key to their success. These plants do well in many conditions. But, there are a few things to think about when picking the best place to plant them.
Elderberries love sunlight, especially for growing fruit. They can handle some shade, but more sun means better growth. Look for a spot that gets 6-8 hours of direct sunlight each day.
Soil pH is also important. Elderberries grow best in slightly acidic soil, with a pH of 5.5-6.5. They can handle a wider range, but this is ideal. Good drainage is also key, as they don’t like wet conditions.
- Blue elderberry thrives in various light conditions, from full sun to part shade, and can even tolerate full shade.
- Elderberries prefer soils with a pH between 6-7 and moderate to good drainage.
- Ideal growing locations for elderberries include forest edges, sunny openings near water sources, and drier open habitats with access to moisture.
Think about the plants’ mature size when picking a spot. They can grow 6-10 feet tall and 8 feet wide. Make sure there’s enough room for them to spread. Elderberries can also form thickets, making them great for hedgerows or wildlife habitats.
By considering these factors and choosing the right spot, you’ll have a great elderberry harvest. Keep an eye on your plants and adjust as needed to help them thrive.
How to Grow Elderberry: Essential Requirements
Growing elderberry (Sambucus spp.) is rewarding for home gardeners. It’s key to know what it needs for healthy growth and lots of harvests. We’ll look at soil, sunlight, and temperature needs for growing elderberry in your garden.
Soil Preparation and pH Levels
Elderberries love moist, fertile soil with a pH of 5.5 to 6.5. They can handle some drought but not sandy or wet areas. Before planting, add compost or organic matter to the soil. This helps with drainage and nutrients.
Sunlight and Water Needs
Elderberries need full sun for best flowers and fruit. But they can also do well in partial shade, especially in hot places. They need consistent moisture, especially when they’re young, because their roots are shallow.
Temperature and Climate Considerations
Elderberries are cold-hardy and can handle temperatures as low as USDA zone 3. They’re great for colder areas. While they can survive some drought, they grow best in temperate climates with regular rain.
Knowing the elderberry growing conditions and meeting their needs will help you grow a thriving patch. Next, we’ll talk about planting techniques and timing!
Planting Techniques and Timing
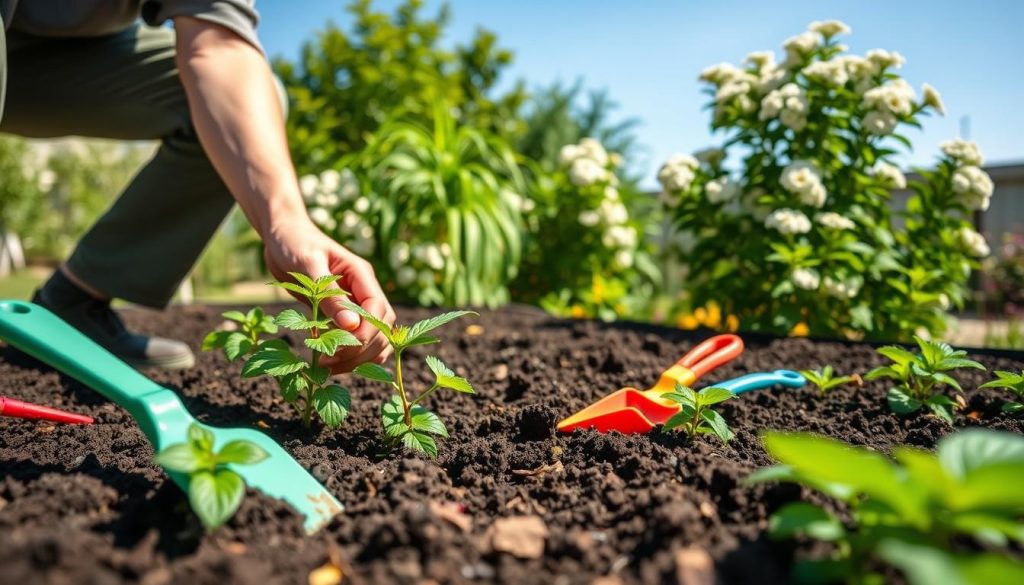
Growing an abundant elderberry patch starts with proper planting techniques and careful timing. Elderberries thrive when planted in the right season, with the right soil preparation, and the right care. Let’s dive into the details to ensure your elderberry planting success.
For optimal growth, plant elderberries in the spring or early fall, depending on your climate. In regions with cold winters, spring planting is ideal. This allows the plants to establish strong root systems before the first frost. In milder climates, late summer or early fall plantings work well. This way, the plants can still root before winter dormancy.
- When planting bare-root elderberry plants, do so immediately upon receiving them. Dig a hole twice as wide as the root ball and slightly deeper.
- For containerized elderberries, plant them a bit deeper than the old soil level, ensuring the crown is just below the surface.
- For bare-root plants, position them at the old soil line or slightly deeper. Water thoroughly after planting and apply a thick layer of mulch to retain moisture.
Remember, elderberries thrive in well-drained, moderately acidic soil with a pH between 5.5 and 6.5. Prepare the planting site by amending the soil with organic matter to ensure optimal growing conditions. With the right planting techniques and timing, your elderberry patch will be off to a strong start.
Soil and Fertilization Requirements
Elderberries can grow well in many soils. But, they need the right soil and nutrients to do their best. Preparing the soil and adding the right nutrients is key.
Organic Matter and Composting
Adding organic matter like compost helps elderberries a lot. Before planting, mix in well-rotted manure or compost. This makes the soil better at holding water and nutrients.
It also helps the soil pH stay between 5.5 and 6.5. This is what elderberries like best.
Fertilizing Schedule
Elderberries don’t need a lot of fertilizer. They get enough from the compost in the soil. But, if they look weak, an organic fertilizer can help.
Use 1/8 pound of ammonium nitrate for each year of the shrub’s age. Don’t use more than 1 pound per plant. Or, you can use 10-10-10 fertilizer. Apply 1/2 pound for each year of the shrub’s age, up to 4 pounds per plant.
Mulching Methods
Putting a 2-3 inch layer of organic mulch around the plants helps. Use compost or wood chips. It keeps the soil moist and adds to the organic matter.
It also keeps weeds away and keeps the soil healthy. By adding organic matter, fertilizing right, and using mulch, your elderberries will grow well. They will give you lots of fruit.
Watering and Maintenance Tips
It’s important to water and maintain your elderberry plants well. This ensures they grow strong and give lots of berries. Here are some key tips for elderberry plant care.
In the first year, keep the soil moist but not too wet. Aim for about an inch of water each week. This helps the young plants grow strong roots. When they get older, around 2-3 years, they can handle some drought. But still, water them often during dry times.
Mulching around the plants helps keep the soil moist and stops weeds. Use organic mulches like wood chips or bark. Keep a 2-4 inch layer. It saves water and adds nutrients to the soil as it breaks down.
- Remove any dead, damaged, or broken branches to keep the plant healthy.
- Manage suckers, or new shoots, that come from the base. They can compete with the main stems.
- Prune lightly in early spring to shape the plant and encourage new growth.
By following these elderberry plant care tips, your plants will thrive. They’ll give you lots of berries to enjoy. With proper attention to watering, pruning, and sunlight, your elderberry bushes will flourish and reward you with a bountiful harvest. In addition to elderberries, you might also consider learning how to grow gooseberries, as they are similarly hardy and offer delicious, tangy fruit. Whether you’re cultivating elderberries or gooseberries, ensuring nutrient-rich soil and consistent care is key to success.
| Watering Requirement | Soil Moisture | Mulching | Maintenance Tasks |
|---|---|---|---|
| 1 inch per week during first year | Consistently moist, not waterlogged | 2-4 inch layer of organic mulch | Remove dead/damaged branches, manage suckers, prune lightly in early spring |
Pruning and Training Methods
Keeping your elderberry plants healthy and productive needs careful pruning and training. Knowing when and how to prune helps ensure you get lots of fruit every year.
Seasonal Pruning Guide
The best time to prune elderberries is in late winter or early spring when they’re asleep. Pruning them every year helps them grow new stems for fruit. Cut off any dead, damaged, or weak stems to help new growth.
There are two main ways to prune. You can shorten stems by a third or cut them all the way to the ground. Cutting them all the way to the ground makes the plant grow new stems but might delay fruiting the next year.
Shape Management
Elderberries often grow new stems from the base. To keep them looking good, remove these suckers often. Also, prune the oldest, thickest stems first to keep the younger ones growing.
Some elderberries, like Nova, grow only 5-6 feet tall. This makes them easier to prune. But, bigger varieties like Wylewood need more pruning to stay in shape and produce fruit well.
Rejuvenation Techniques
Elderberries usually reach their best production in the first three years. After that, prune them every four to five years to keep them going. Cutting them down to 12 inches helps them grow new, strong stems. This might make them fruit less the next year but makes them last longer.
Pruning and training methods can change based on the type of elderberry, your climate, and what you like. Try different things, watch how they do, and adjust as needed to find what works best for you.
| Pruning Technique | Benefits | Considerations |
|---|---|---|
| Shortening Stems by 1/3 | Encourages new growth and fruit production | Can be done annually |
| Cutting to the Ground | Rejuvenates the plant for increased vigor | May delay harvest the following year |
| Removing Suckers | Maintains an attractive, manageable shape | Should be done regularly |
| Hard Pruning (4-5 years) | Extends the lifespan and productivity of the plant | Delays fruiting for one year |
Common Pests and Disease Management
Elderberries are tough plants but can face problems like heavy snow and high winds. A big pest is the Spotted Wing Drosophila, a small fruit fly. It’s key to watch your plants for signs of trouble.
Pruning and keeping air moving can stop many issues. If problems arise, talk to your local extension services. They can help with what to do next.
Identifying and Controlling Common Elderberry Pests
- Thrips – These tiny insects feed on plants by sucking out their contents.
- Cane Borer – A wilted tip on plants and hollow branches are signs of this pest.
- Spotted Wing Drosophila – This fruit fly infests berries, needing special sprays.
Managing Elderberry Diseases
- Tomato Ringspot – Spread by worms or pollen.
- Fungal Canker – Weakened plants from injury or weather stress.
- Powdery Mildew – Whitish-gray mold on leaves.
- Leaf Spot – Black or brown spots on leaves.
- Thread Blight – Wilts leaves, especially in shade.
- Root Rot – Yellowing leaves in wet soil.
- Verticillium Wilt – Yellow leaves, slow growth, and branch death.
Always follow pesticide or fungicide labels carefully. Your County Extension Agent can offer the best advice for control.
| Pest or Disease | Recommended Control Products | Application Timing |
|---|---|---|
| Spotted Wing Drosophila | Danitol 2.4EC, Delegate 25WG, Entrust SC, Exirel 0.83SE, Mustang, PyGanic 1.4EC | Summer sprays during berry development |
| Fungal Diseases (Heterophoma, Puccinia rust) | Abound, Cabrio EG, Pristine, Switch, Bumper 41.8EC, Propiconazole | Foliar applications at different growth stages |
| Organic Disease Management | Regalia, Neem oil, OSO 5SC | As needed throughout the growing season |
Keep an eye out for pests and diseases to protect your elderberries. With quick action and local advice, you can have a great harvest.
Harvesting and Storage Guidelines
I love waiting for the elderberry harvest season every year. The ripe elderberries turn a deep purple, signaling it’s time to pick. The best time to harvest is from mid-August to mid-September, when they’re dark purple to almost black.
When to Harvest
Harvesting elderberries needs to be done at the right time. Check the clusters and pick them when they’re fully ripe. Make sure to remove any unripe or damaged berries and stems, as they can be toxic. This way, you get only the best elderberries for your recipes.
Post-Harvest Handling
Fresh elderberries spoil quickly, so handle them carefully. Put them in the fridge or freezer right after picking. If freezing, remove the berries from their clusters to avoid mushiness. Dried elderberries also keep their antioxidants and flavor well.
Storage Methods
Storing elderberries properly keeps them fresh and safe. Fresh berries last up to 12 hours in the fridge. For longer storage, freeze or dry them. Frozen berries last months, and dried ones are easy to keep in your pantry. Always remove bad berries to keep your elderberry products safe.

